Hi, this is Somer, stopping in for a little visit. I wanted to share a cute little top I made with you. It all started when I decided to make a Bandana Top, which turned out adorable, but I thought why be limited to bandanas? So I tried it with fat quarters and look how cute.

Let's get started. You need two matching fat quarters or 1/2 yard of fabric, 3/4" wide elastic, extra wide double fold bias tape, a measuring tape, pins, scissors, something for marking, and a sewing machine. Read through the directions before you start and email me (rainydaywren@gmail.com) if you have any questions.


If you are using 1/2 yard of fabric, cut it into two rectangles about 18" x 22", in half. Lay your two rectangles together, right sides facing. Along one 22" side, make a mark at 4" down from one corner (if your child is older than six you might want to mark at 5".)


Connect your two marks in a "half-U" shape and cut through all four thicknesses along your line to form the armholes.


Unfold and pin the two rectangles together along both 22" sides, matching up cut armholes. Sew side seams with 1/4" seam allowance and finish seam.


Cut one of the previously 18" sides (from armhole to armhole) 1/2" lower than the other. The higher side will become the back, the lower, the front.

Fold both the front and the back (again, between the armholes) 1/4" in and press.


Fold both the front and the back (again, between the armholes) 1/4" in and press.

Use a safety pin to feed elastic through casing. Stitch perpendicular to top, to catch elastic on each end.


Cut two pieces of bias tape about 15" - 16" long. The bias tape will encase the raw edges of the armholes and form the straps of the shirt. Pin bias tape around armhole, wider side of tape along wrong side of fabric. Overlap edges at side seam. I started pinning at the side seam and pinned up to the top of the shirt. Then, making sure the bias tape wasn't twisted, I started pinning from the other side. The extra will make the strap.


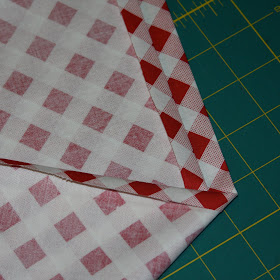
To maximize the length of the top, I also finished the hem with bias tape. Start pinning at one side and pin all the way around, folding the end over and overlapping to hide raw edge. If you place the wider side in the back then when you sew from the front you will be sure to catch the back of the bias tape.


It fits a 4-year-old through 8-year-old as a cute tunic top, and a one-year-old through three-year-old as a cute little sundress.


super cute nadine! I think I will try one for my girls . Thanks for the tutorial.
ReplyDeleteI actually used fat quarters to make my two daughters dresses earlier this year, which incidentally enough, was the first time I had ever gone to Material girls to shop; since that was where I got the fabric!
ReplyDeleteLove the colors.. very patriotic!