


| I can't believe that March is over! I am not finished with my Spring cleaning yet it can't be over. We have done a little Spring cleaning at the shop. We have added several lines to our clearance $3,99 and up, and have loads of "$1.00 fat quarters" but thats not all....., Sale starts Fricday March 30th and ends on Saturday March 31. We will also have the "Shannon the pillow Lady here" with all her cute Springy things *Regular priced fat quarters buy 5 get the 6th free! *All 30's fabrics 30% off *clearance kits 50-75% off all books and patterns 30% off (in stock only) *Grab Bags $15.00 plus we will have several other lines on sale too!! Follow our blog http://www.thematerialgirlsquilts.blogspot.com and our Facebook http://www.facebook.com/pages/The-Material-Girls-Quilts/101115782899 see ya soon, Nadine | ||
Thursday, March 29, 2012
Spring it on Sale!!
A Retreat

Nadine
Tuesday, March 27, 2012
Dish Cover Tutorial
I am constantly taking dishes to and from places. Now I can do it in style and know that my cover wont fall off!! This is for a bowl, but using the instructions you can easily make one for a square or rectangle dish.

What you need
-the desired dish to be covered
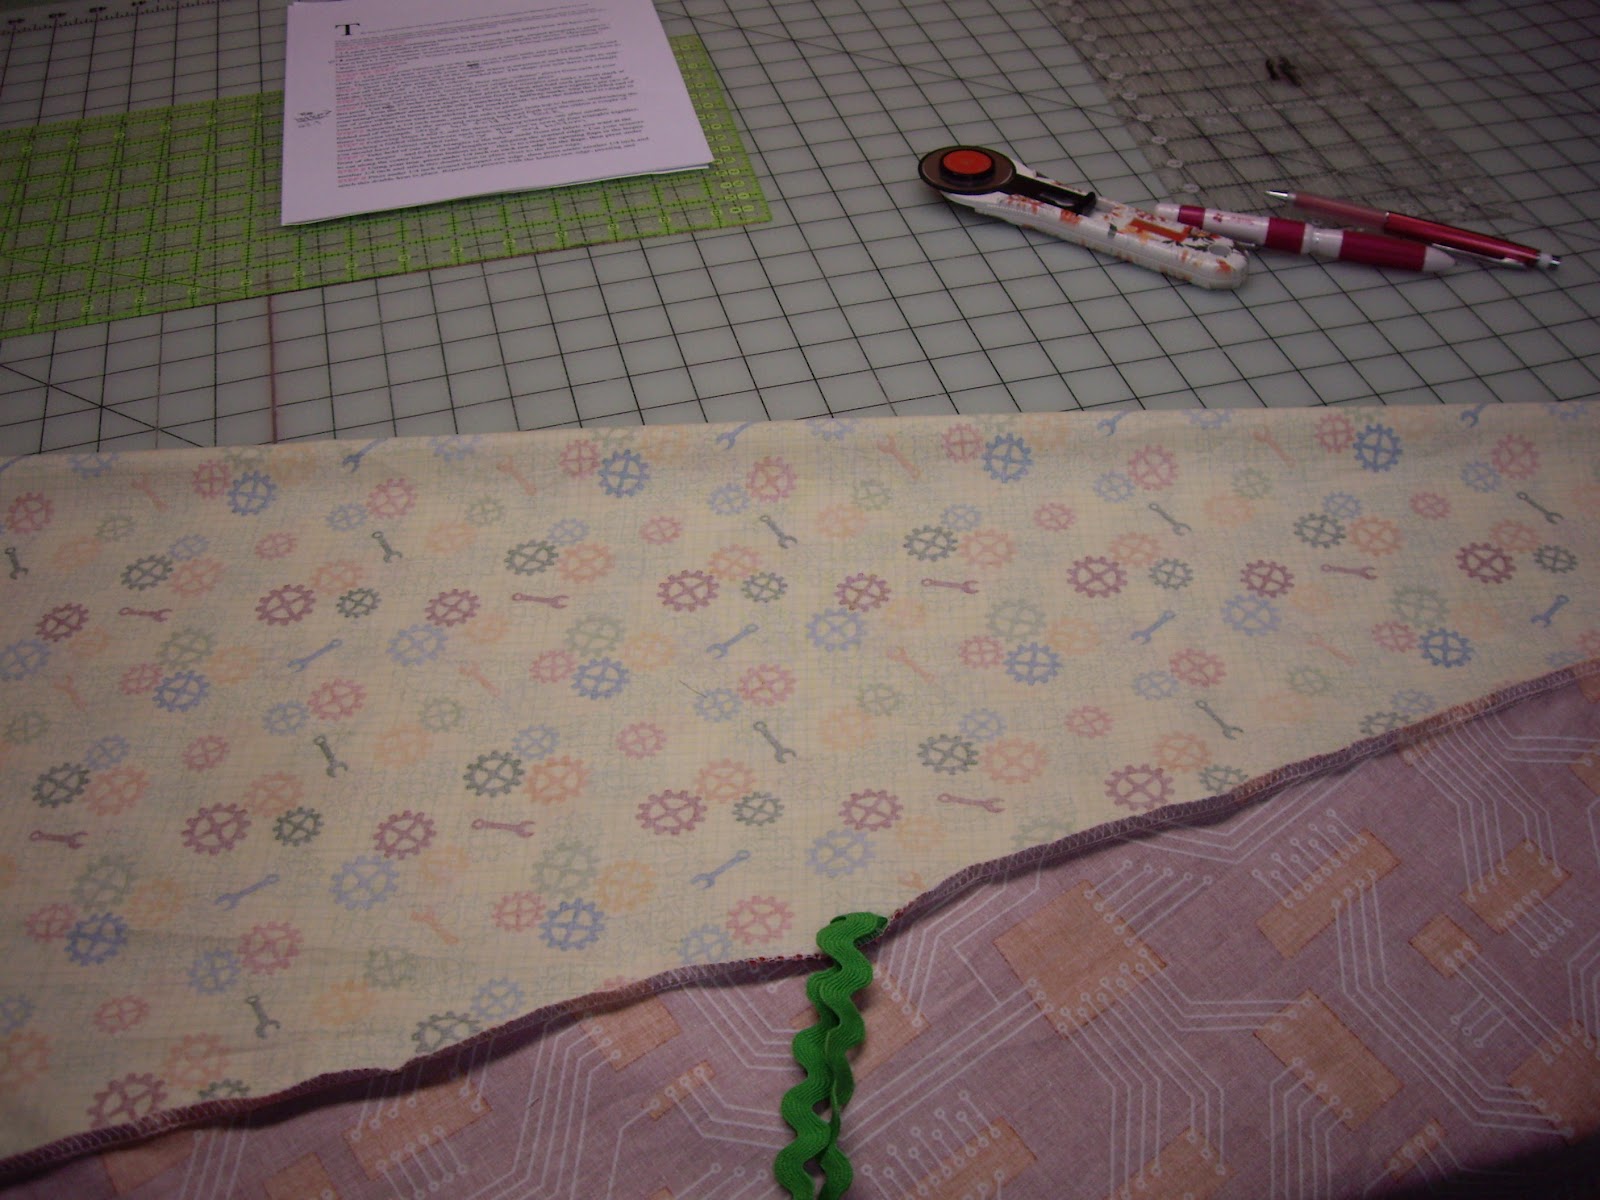
-2 different vinyl fabric - I had 2 half yard cuts. I got 3 covers out of that.
-1/4 inch elastic
-marker

-Place your vinyl right sides together

-put dish on top of fabric and trace around about 2 inches away from sides. This does not need to be exact.

-sew ON THE LINE. leave a 2 inch opening for turning and threading elastic


-cut out 1/4 inch from sewn line

-Turn - this stinks cause the vinyl sticks to itself but just keep wiggling.

-Sew a line 1/2 inch from edge all the way around

-thread your elastic through with safety pins.

-place cover over your dish and pull elastics until it is tight against the sides. pin together so they don't shift

-sew elastics closed and tuck up in the cover
- sew the cover closed.

-make, take and celebrate!!!
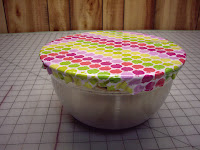

I used 2 different vinyls so mine can be reversible. Easy to wipe off to clean. They can also go in a cold wash/no dryer.

What you need
-the desired dish to be covered
-2 different vinyl fabric - I had 2 half yard cuts. I got 3 covers out of that.
-1/4 inch elastic
-marker

-Place your vinyl right sides together

-put dish on top of fabric and trace around about 2 inches away from sides. This does not need to be exact.

-sew ON THE LINE. leave a 2 inch opening for turning and threading elastic


-cut out 1/4 inch from sewn line

-Turn - this stinks cause the vinyl sticks to itself but just keep wiggling.

-Sew a line 1/2 inch from edge all the way around

-thread your elastic through with safety pins.

-place cover over your dish and pull elastics until it is tight against the sides. pin together so they don't shift

-sew elastics closed and tuck up in the cover
- sew the cover closed.

-make, take and celebrate!!!

Monday, March 26, 2012
Easter project

Nadine
Sunday, March 25, 2012
Lampshade Re-do
 |
| Finished light shade |

I somehow have lost the next picture so I am going to try and explain it the best I can. I found a sheer fabric, I had intended to do just a lace but found this flowery sheer fabric at our local Joanns. The lampshade I used has 6 sections. The top is narrower than the bottom. I measured the top and the bottom and added 1 inch to all 4 sides of my sheer fabric. I then cut my fabric in a wedge shape (don't worry if it isn't the perfect shape just make sure it will cover the entire section you are working on), I ran a fine line of E6000 glue to the top bar of my lampshade, folded under about a half inch and attached it to the top of the shade, (I let this dry a little) then ran a strip of glue down one of the metal bars, turned under a half inch and attached one side of the my fabric wedge. Then I did the other side the same way. Make sure that you have your fabric pulled tight so that it is nice and smooth. I then glued the bottom of the fabric to the bottom of the shade. Repeat this for all 6 sections. Don't worry about any excess fabric on the inside. After all your sections are attached and the glue is dried trim the excess fabric on the inside of the shade. Try and be as neat as possible with your glue, it will look a little rough on the bars but don't worry we will be adding a trim, I added a really small trim from top to bottom of each bar and ran 2 rows of rosette trim to the top and bottom of the shade.
 |
| We sell both of the trims at the shop |

Nadine
Thursday, March 22, 2012
Moda Bakeshop Love!!

I will post pictures of my completed project soon!
Nadine
Wednesday, March 21, 2012
New stuff and craft room update!


See ya!
Nadine
Tuesday, March 20, 2012
Mouse trap clip tutorial
If you are like me you have a ton a stuff hanging on your fridge. I envy those who don't. I saw this idea and had to try it. Yay for fridge clips that organize all my stuff!

What you need

mouse trap
spray paint
embellishment (i ended up using different stickers so ignore the monkeys)
magnets
pliers
tape (if you want to keep the metal copper colored, I sprayed over mine)
-Using the pliers pull off all the 2 metal pieces (leave only the spring and outside wire

-If you want to tape the spring and wire this is the time to do it
-spray paint it

-let it dry
-add embellishment
-flip over and glue (or stick) magnet to the back

-done and get organized!!!
Monday, March 19, 2012
Go Cutter

Thanks,
Nadine
Sunday, March 18, 2012
Cupboard door re-purposed
 |
| I forgot to take a picture of my original door but it looked just like this |
 |
| finished project! |
Nadine
Thursday, March 15, 2012

| Happy St. Paddy's Day everyone!! We have decided to get our "Irish On" and have a sale!!! Friday March 16th and Saturday March 17th. We know how you love a sale!! Also, Brian the scissor guy will be here to sharpen your scissors, pinking shears, and just any old pair of scissors on Saturday March 17th from 10-3pm. You will love your scissors after he gets done with them! *All green fabric (green background) 25% off*All books and patterns 30% off. *We have added 100's of sale fat quarters at $1.00 *get a shamrock and get an additional discount. Be sure and follow us on our blog www.thematerialgirlsquilts.blogspot.com or Facebook The Material Girls Quilts, and PinterestBe sure and wear your green so you don't get pinched! Nadine and the girls | ||
This is Mac the scissor guy...
Like Nadine said, I will be in the shop on Saturday the 17th from 10 to 3. Scissors will be $10 for one or $15 for 2. They will be done by closing (8pm) This is the last day for the special 2 for pricing. If you cant make it in there is the drop off and pick up also. I can have your scissors back to you in 2 or 3 days.
Remember I am not limited to just sewing scissors. I can sharpen nippers, embroidery snips, scrapbooking scissors and yard/kitchen shears.
Also I have my own blog now so make sure to check that in store dates and other information as well. www.macthescissorguy.blogpsot.com.
Thanks Nadine for letting me use your shop and blog!!!
Wednesday, March 14, 2012
Part I of the sewing room makeover
 |
| window, and another bag of fabric |
 |
| closet that is full of kits that I plan on sewing when I retire |
 |
| all taped and ready for paint |
 |
| This is a weird ceiling thingy |
 |
| A vinyl saying on my wall, gee, I will miss that! |
 |
| I used to toll paint and needed this sink, I am tiling behind it. Wish me luck! |
Enjoy!
Nadine
Tuesday, March 13, 2012
Tee pee tutorial
This is quick to make, easy to set up teepee that is great for inside or out. The inside bottom is about 3 feet by 3 feet, so lots of room to play.

WHAT YOU NEED
- 1.5 yards each of four contrasting fabrics, for the outside of the teepee (you will have some fabric left over for smaller projects) 6 yards total if you want all one fabric.
- 10 yards fairly sturdy ribbon or woven cotton tape (lovely, bright, striped grosgrain is perfect) l
Four 6 feet x 1 inch-diameter wooden dowels, available from hardware stores, 1 inch pvc pipe will also work.
Measuring tape l Ruler l Dressmaker’s chalk l Scissors l Bobble-headed pins l Sewing machine and thread l Needle and thread l Iron

STEP BY STEP
STEP 1 Lay one of your fabrics out on the floor or on a large table and use your tape, ruler and chalk to measure and draw a triangle that is 35.5 inches across the base and 54 high from base to apex. Then cut out the triangle with your scissors.

STEP 2 Draw a line across the top of the triangle where it measures 6 inches from side to side, then cut off the top of the triangle along the marked line. The shape you now have is a triangle with the top lopped off – a bit like a volcano.

STEP 3 Use this piece as a pattern to cut out three more “volcano” pieces from each of your colored fabrics – four pieces in all, including your original pattern piece.
STEP 4 Measure halfway down the side edges of all of the triangles and make a small mark at this point. Cut eight 27 inches lengths from your piece of ribbon and fold each piece in half crosswise. Trim the cut ends at an angle to prevent fraying. With right sides together, pin two of your triangles together along one side edge, matching your halfway marks. Slip the folded end of one of your ribbons in between the layers at the marked point, so that the folded end is caught in your seam and the loose ends are sticking out. Pin in place. Place the other 4 lengths about 3 inches from the bottom edge in the same way.


STEP 5 Allowing a 1/4 inch seam, stitch the sides together from top to bottom, sandwiching the folded end of the ribbon in the seam and reversing back and forth over the ribbon a couple of times for extra strength. I serged all of my raw edges so they didn't fray as time went on.

STEP 6 Following Steps 4 and 5, add the three remaining triangles, one after another, sandwiching a folded ribbon between each seam. When you’ve sewn all four triangles together, you should have a funnel-shaped tube.
STEP 7 Take hold of one of the triangles in the tube – made from the fabric you want at the front of the teepee – and fold it in half lengthwise, aligning the seamed edges. Use your scissors to cut along the centre line, from bottom to top – this is to create the opening flaps in the teepee.

STEP 8 Using your iron, press under 1/4 inch on each raw edge on the flaps, then press under another 1/4 inch and stitch this double hem in place close to the inner edge.
STEP 9 Press under 1/4 inch around the upper raw edge, then press under another 1/4 inch and stitch this double hem in place. Repeat this process with the bottom raw edge, pressing and stitching a double hem. Finally, overlap the very top of the teepee flaps together by about 1/2 inch and sew together, reversing a few times for strength.


STEP 10 Cut four 13 inch lengths of ribbon and trim one end on each into an angle. From the top, measure about a third of the way down the opening edge on each outer flap and mark with a pin. Measure a further 11 inch or so further down from this pin and mark with another pin. Sew a ribbon tie at each pin mark, turning under the raw edge of the ribbon before you sew.

STEP 11 Set up your dowels by tying the remaining length of ribbon around all four, about 12 inches from the top, securing all four pieces together. Pull out the bottom “legs” of the dowel to form the corners of a square, creating your teepee’s frame, then lay the teepee over the frame, aligning the seams along the dowels.
STEP 12 Tie the lining ribbons to each dowel on the inside, and adjust the legs until the fabric is neatly stretched over the frame.
Your teepee is now finished!!!!!

Subscribe to:
Posts (Atom)


